Increase Conversions of AdWords Campaigns by Integrating CloudEngage Personalization
Machine Learning Gone Wrong
Does this sound familiar?
Your marketing team worked really hard to fine tune the keywords, segmentation, and geographic targets of your AdWords campaign to get a very specific customer to come to your website. For illustrative purposes, let’s say you’re targeting parents with young children that might be interested in purchasing a new car seat. Your AdWords campaign is performing well and prospects are clicking through, but when those visitors get to your website they just aren’t converting at the rate you’re shooting for.
Rather than showing them the products featured in your ad, they are landing on your default website where currently, the first thing they see is a promotion for treadmills. This has nothing to do with car seats. The user might browse for a bit looking for the advertised deal that brought them to your door, but most of the time they will get frustrated and leave. In the age of Amazon, 53% of customers prefer a personalized website experience. Thus, your ad campaign is all PB and no J.
Before you go calling your senior developer to create a separate landing page just for your car seat campaign, which is both costly and takes a significant amount of time, consider this: With CloudEngage, you can create countless versions of your existing landing page by personalizing the content displayed to your users based on a selection of triggers. We’ve recently launched the ability to trigger personalized content based on the referral link that brought the user to your page. Now, your website can easily respond to the AdWords campaign by displaying your car seat inventory right on your homepage, showing that parent exactly what they came to see. No hassle for them, increased conversions for you.
Let me show you how…
Step-by-Step Recipe for A Personalized Ad Campaign
1. Create Your Ad Campaign’s Unique UTM Code
This UTM code is just a special type of identification for your ad campaign that is both CloudEngage and Google Analytics optimized following the example below:
Note: Anything after the “?” won’t affect what page the visitor goes to and only exists for Google Analytics tracking and CloudEngage triggering purposes.
➜ Get your Google Analytics and CloudEngage optimized UTM code.
2. AdWords Express Setup:
- Log into your AdWords account and click on “Create New Ad”.
- Choose “Take an action on your website” as the goal.
- Choose the geographic areas where your ad will show.
- Define your product or service, set the language, and select your keywords. You can add others if desired.
- Create your headlines and descriptions, then choose “Clicks on your ad go to”, click on the drop down and paste the UTM code you created into the “Enter a different web page address” field.

3. Set Up Your Referrer Targeted Website Response
- Log into admin.cloudengage.com or start a free trial
- Create the modal, overlay, alert or campaign as usual
- Enable Target Referrer
- Click on “any parameter”
- Paste the link exactly like it was in the ad/post
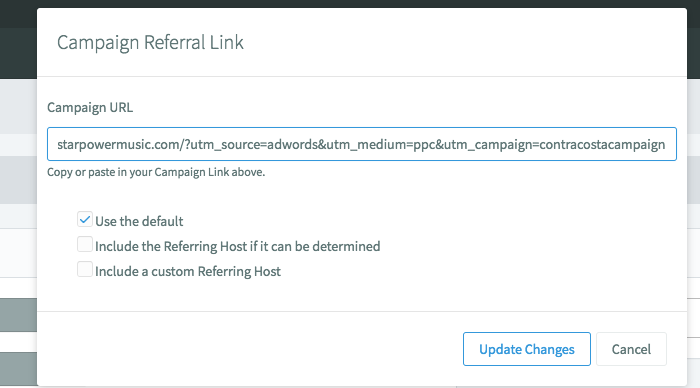
- Select “Use the default” and then “Update Changes”
- Review & Save
Not only can you use this feature to bring your AdWords campaigns full circle to bigger conversion rates, you can use this to increase relevance and customer satisfaction by tying this referral link personalization capability in with your social media campaigns and paid ads as well.
CloudEngage helps you show your audience the right content at the right time. Want us to show you how easy it is? Get in touch to schedule a quick demo.
Related Articles
CBT News: Dealership geo-fence marketing
Location, location, location! It is usually the difference between a shopper looking for an off road capable 4×4 or a city dweller in need of an eco-friendly Nissan Leaf.
CloudEngage Acquires AnswerDash, Leader in AI powered Self-Service Support
We’re thrilled to announce that we’ve acquired Seattle-based AnswerDash, expanding our suite of offerings to Include AI powered self-service support SPOKANE, Wash., AND SEATTLE, Wash., June 23rd, 2020. Our entire team recognized the fit with AnswerDash was terrific....
Subscribe & Follow
Join Our Newsletter
Subscribe to our email list for news and offers. Follow us on social media.
Subscription
"*" indicates required fields