Install CloudEngage in your Joomla Theme
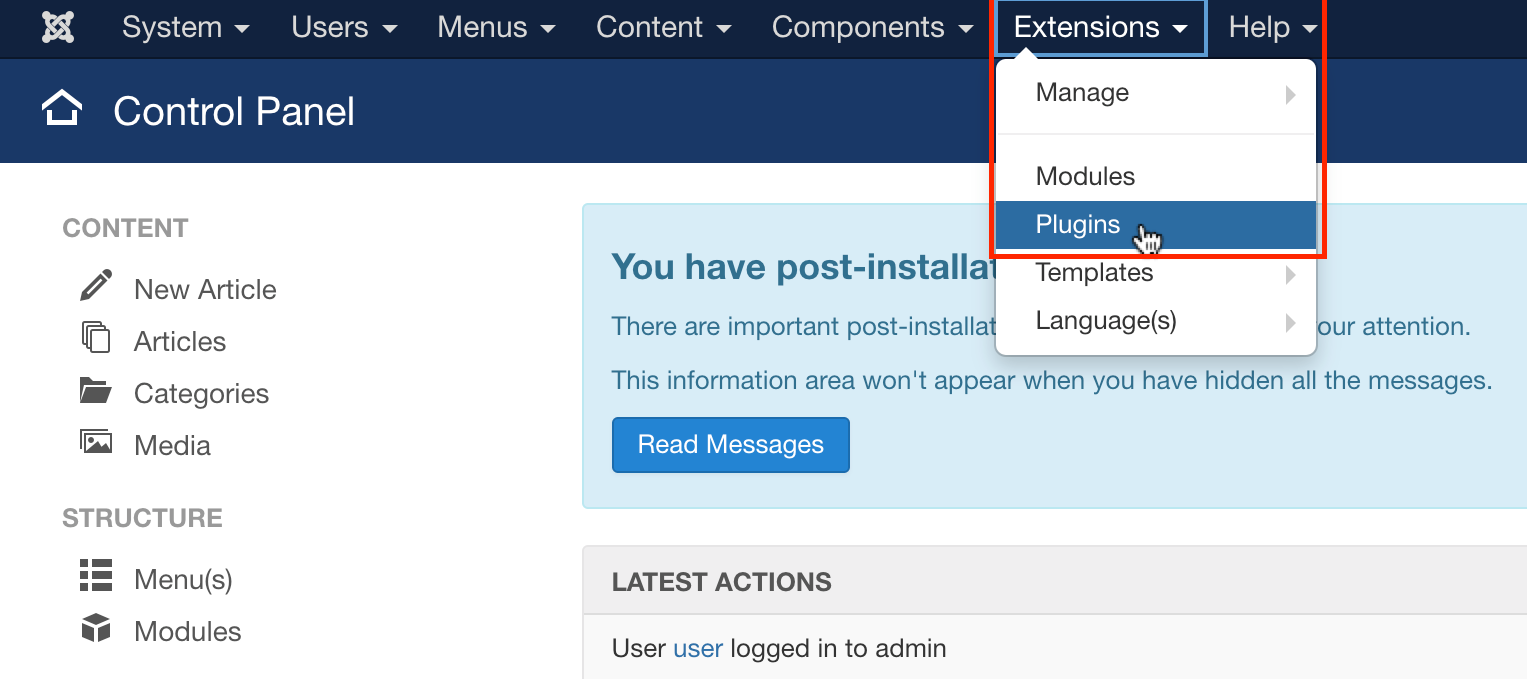
- Once logged into your Joomla admin area, the first thing you need is to navigate to the Extensions > Plugin area.
Here you’ll need to search for “system – add custom javascript”. If there are no results, you’ll need to install the plugin. If the plugin appears in the list of results, skip to step 4.
2. Navigate to https://joomla.impression-estudio.gr/en/joomla-extensions/add-custom-javascript/download and click the link to download the Add Custom Javascript plugin.
3. Back in the Joomla admin area, navigate to the Install area of your Extensions manager and click the upload button. From the resulting window, select and upload the file you downloaded in step 2. Note that you must upload the file just as it was downloaded in .zip format.
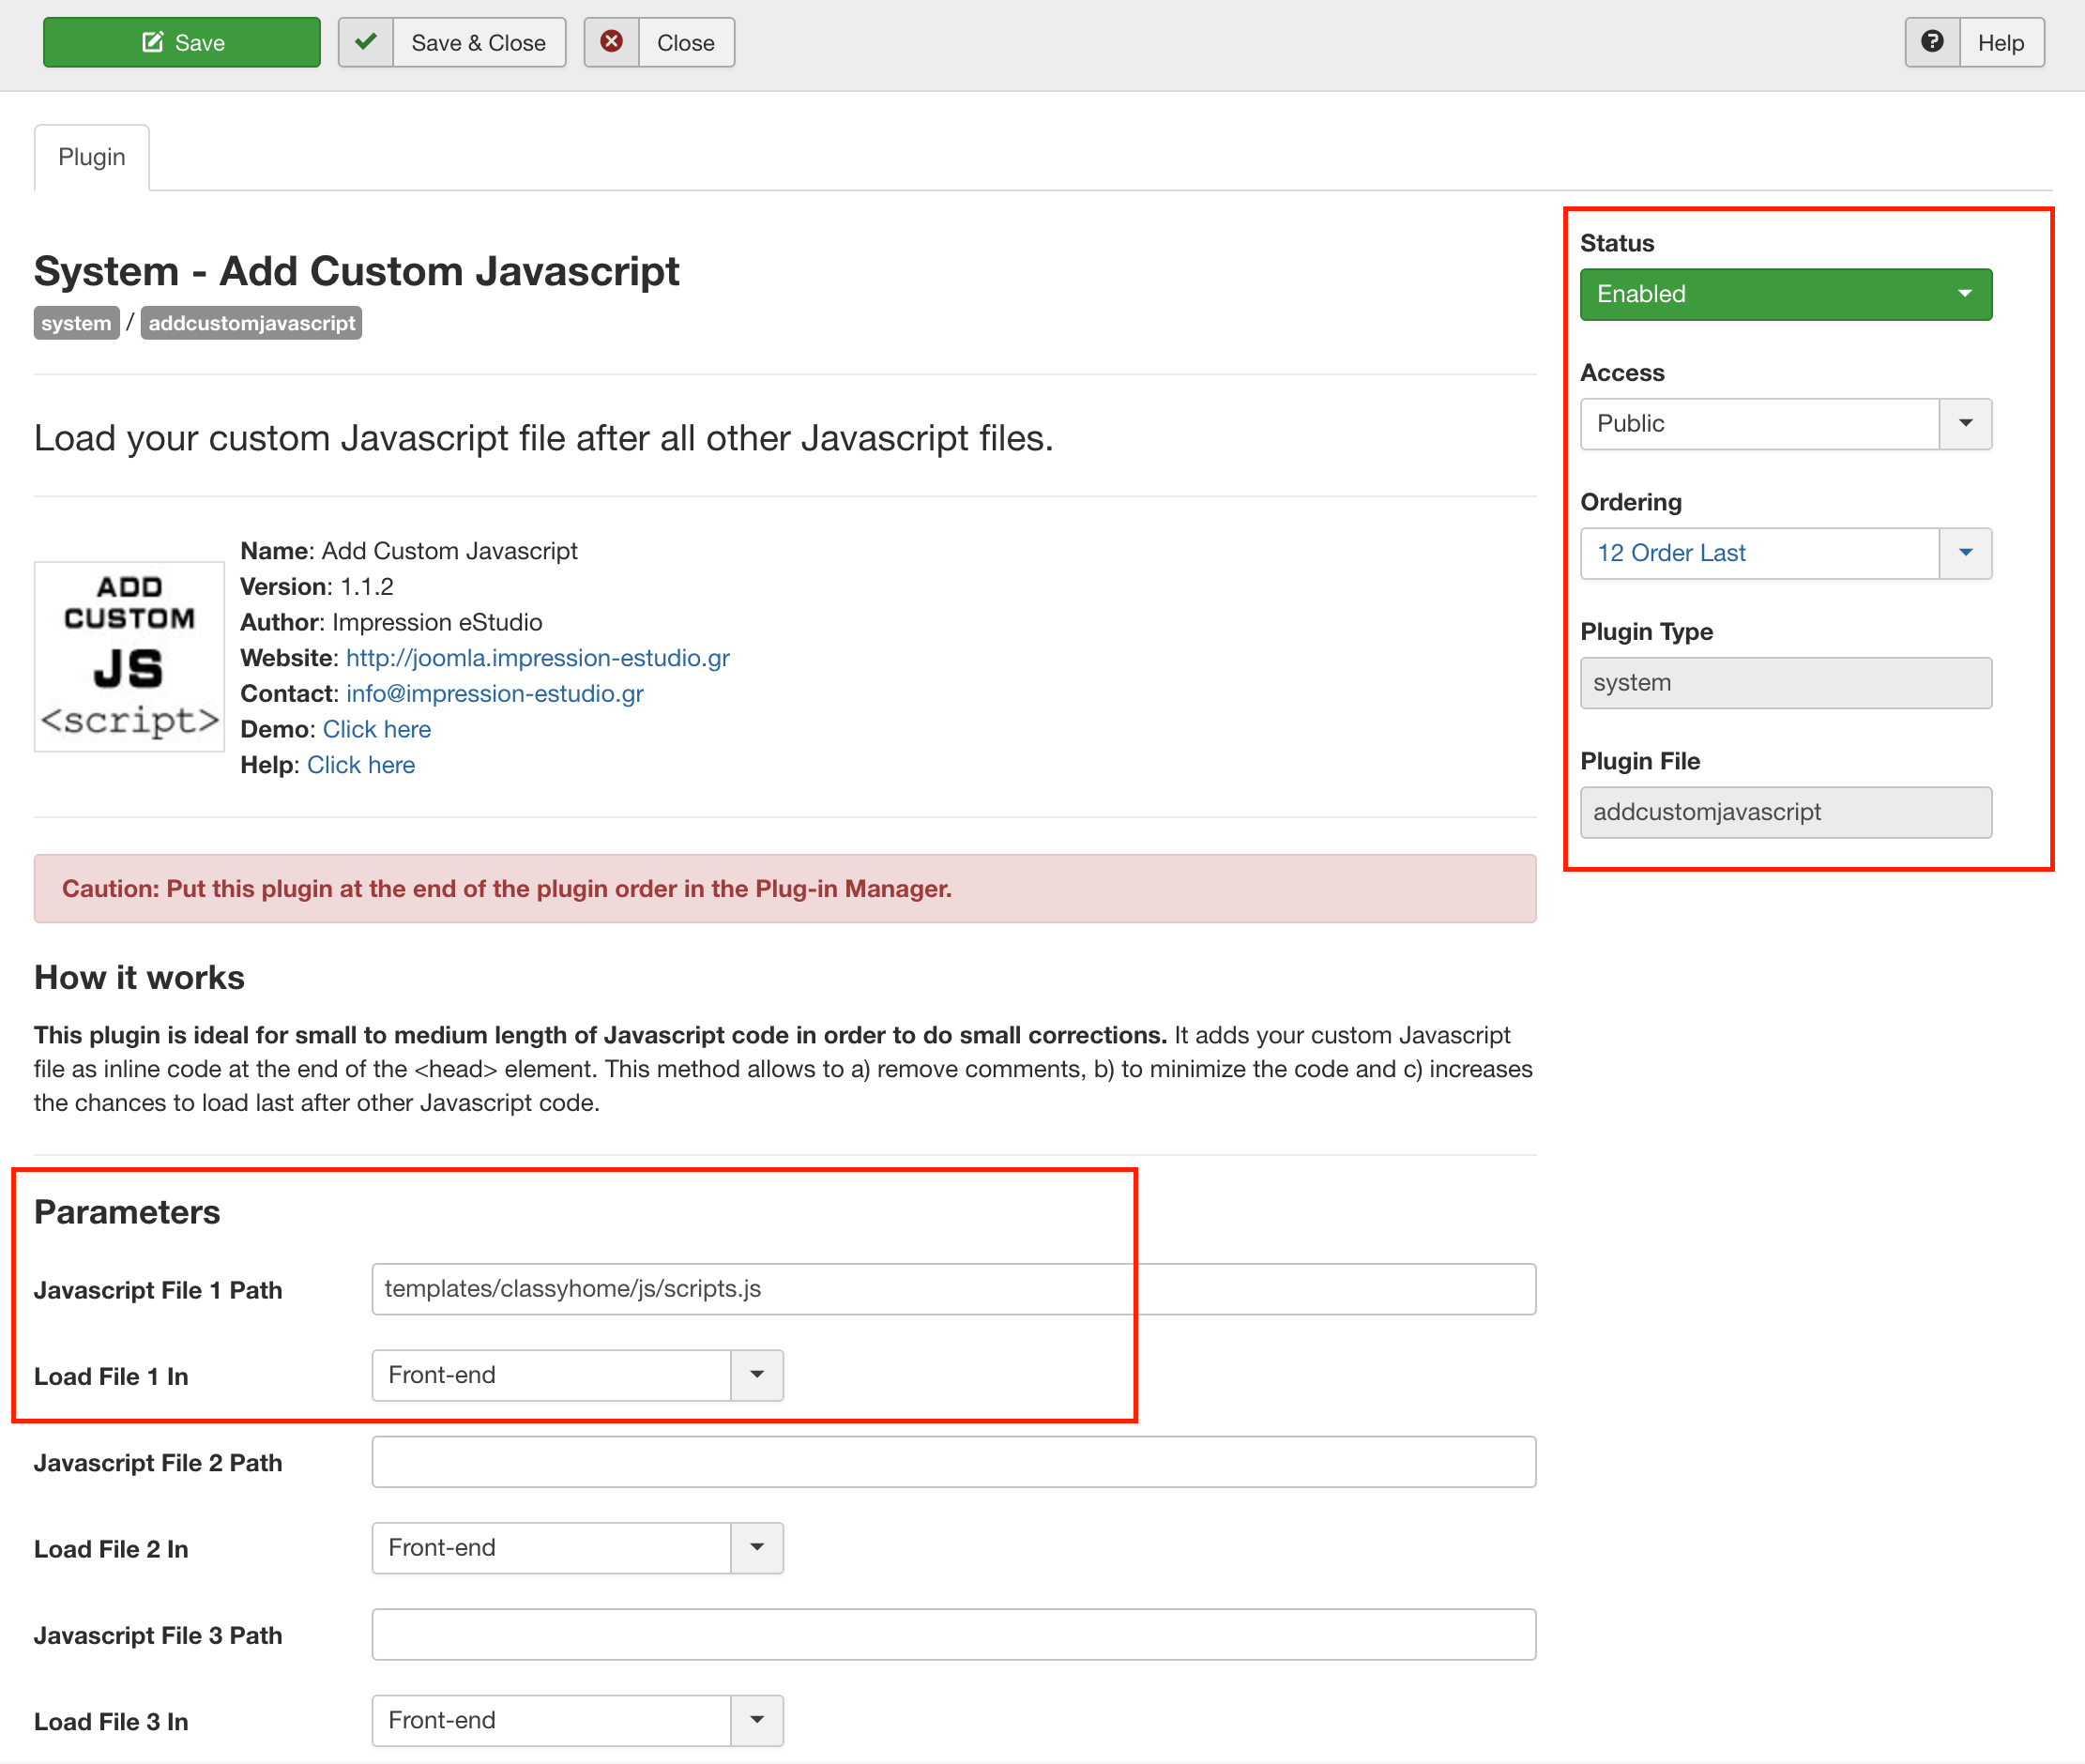
4. Within the Plugins area, you should be able to find the plugin in the search results from your actions in step 2. The status on this plugin must be set to Active, indicated by a green checkmark. Once it is, click the plugin name to navigate to its settings.
5. From this screen, you’ll need to select “Order Last” as the ordering, set Status to Enabled, type out a directory of your choosing in the Javascript File 1 Path field (in the next step, we’ll be creating that path). The only requirement is that the path begins with “templates/*your_template*” as in the example depicted, where *your_template* is replaced by the name of your template. If you are unaware of the exact name of your template, temporarily skip ahead to step 6 and return once you’ve found it.
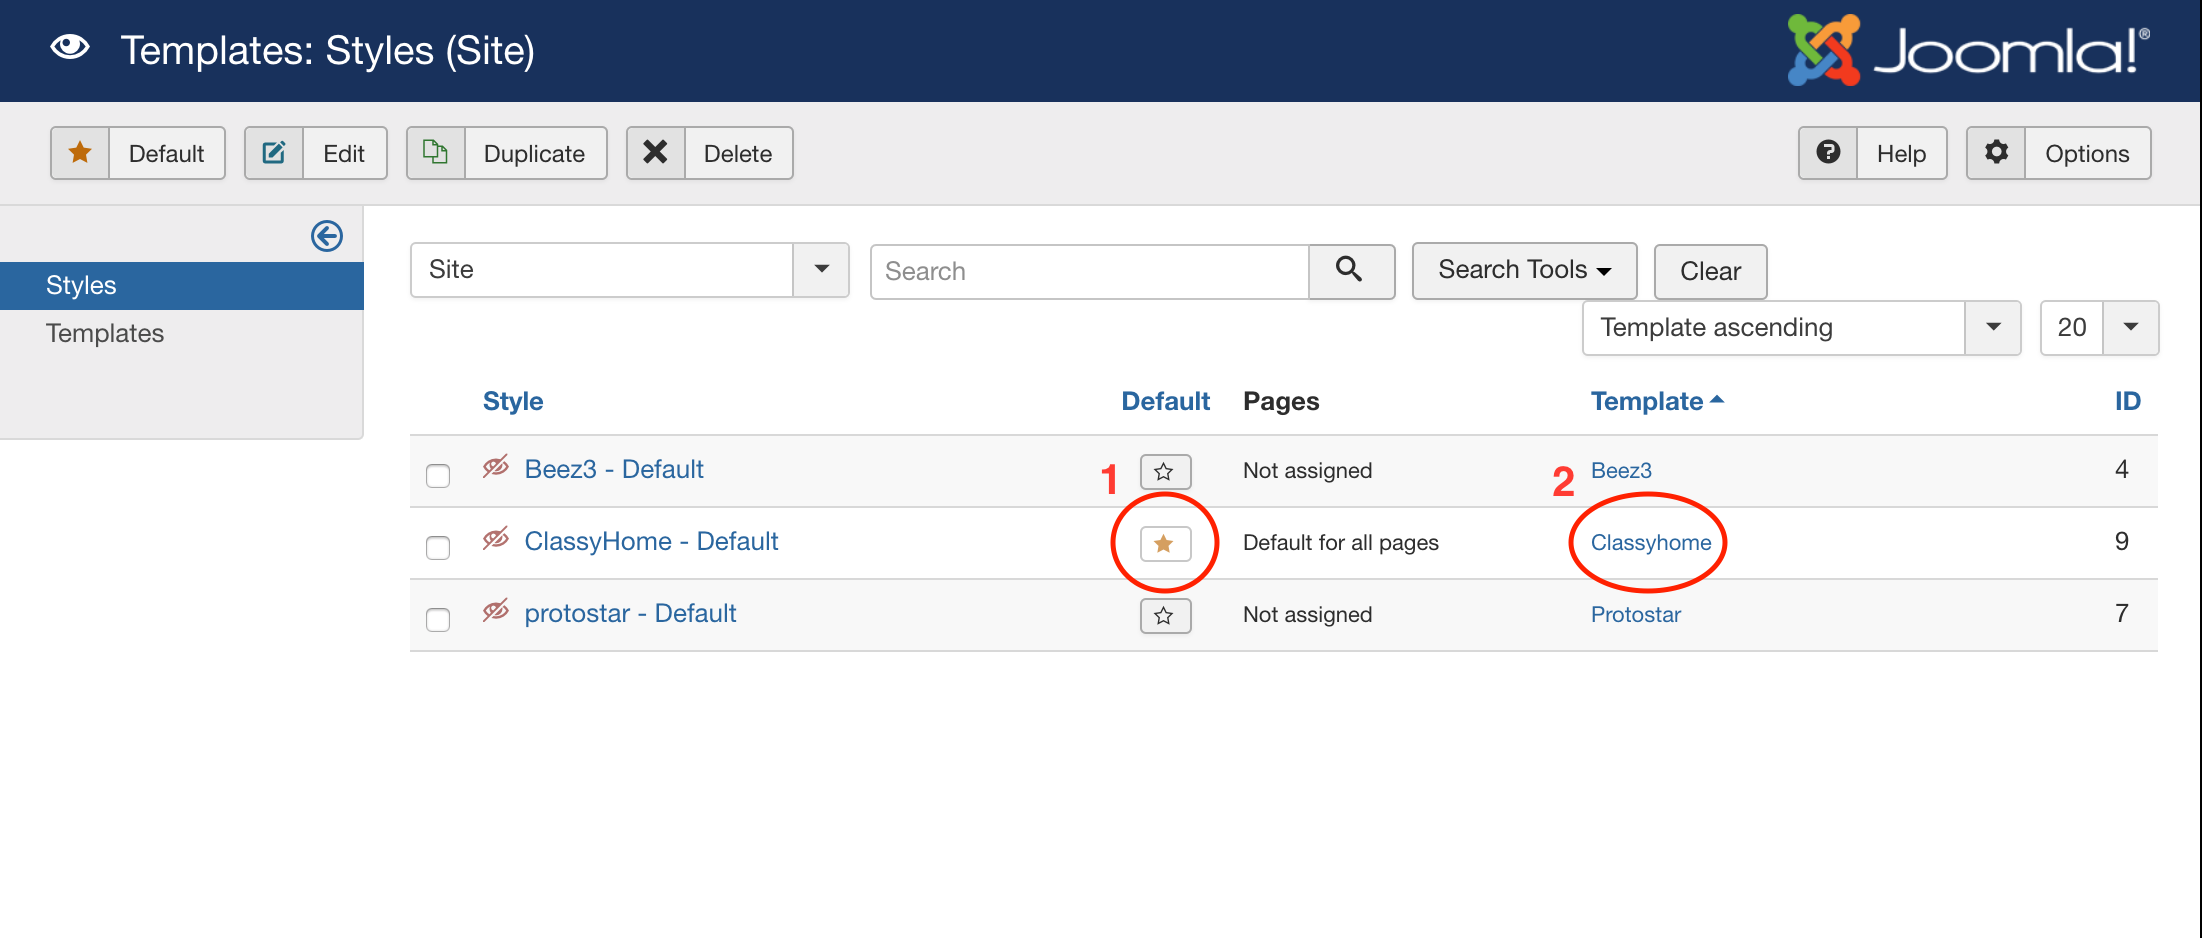
6. Navigate to your template in Extensions > Templates and from the left-side menu select the Templates menu option. From here, click your template by name. Your default template is indicated by the gold star from the previous screen.
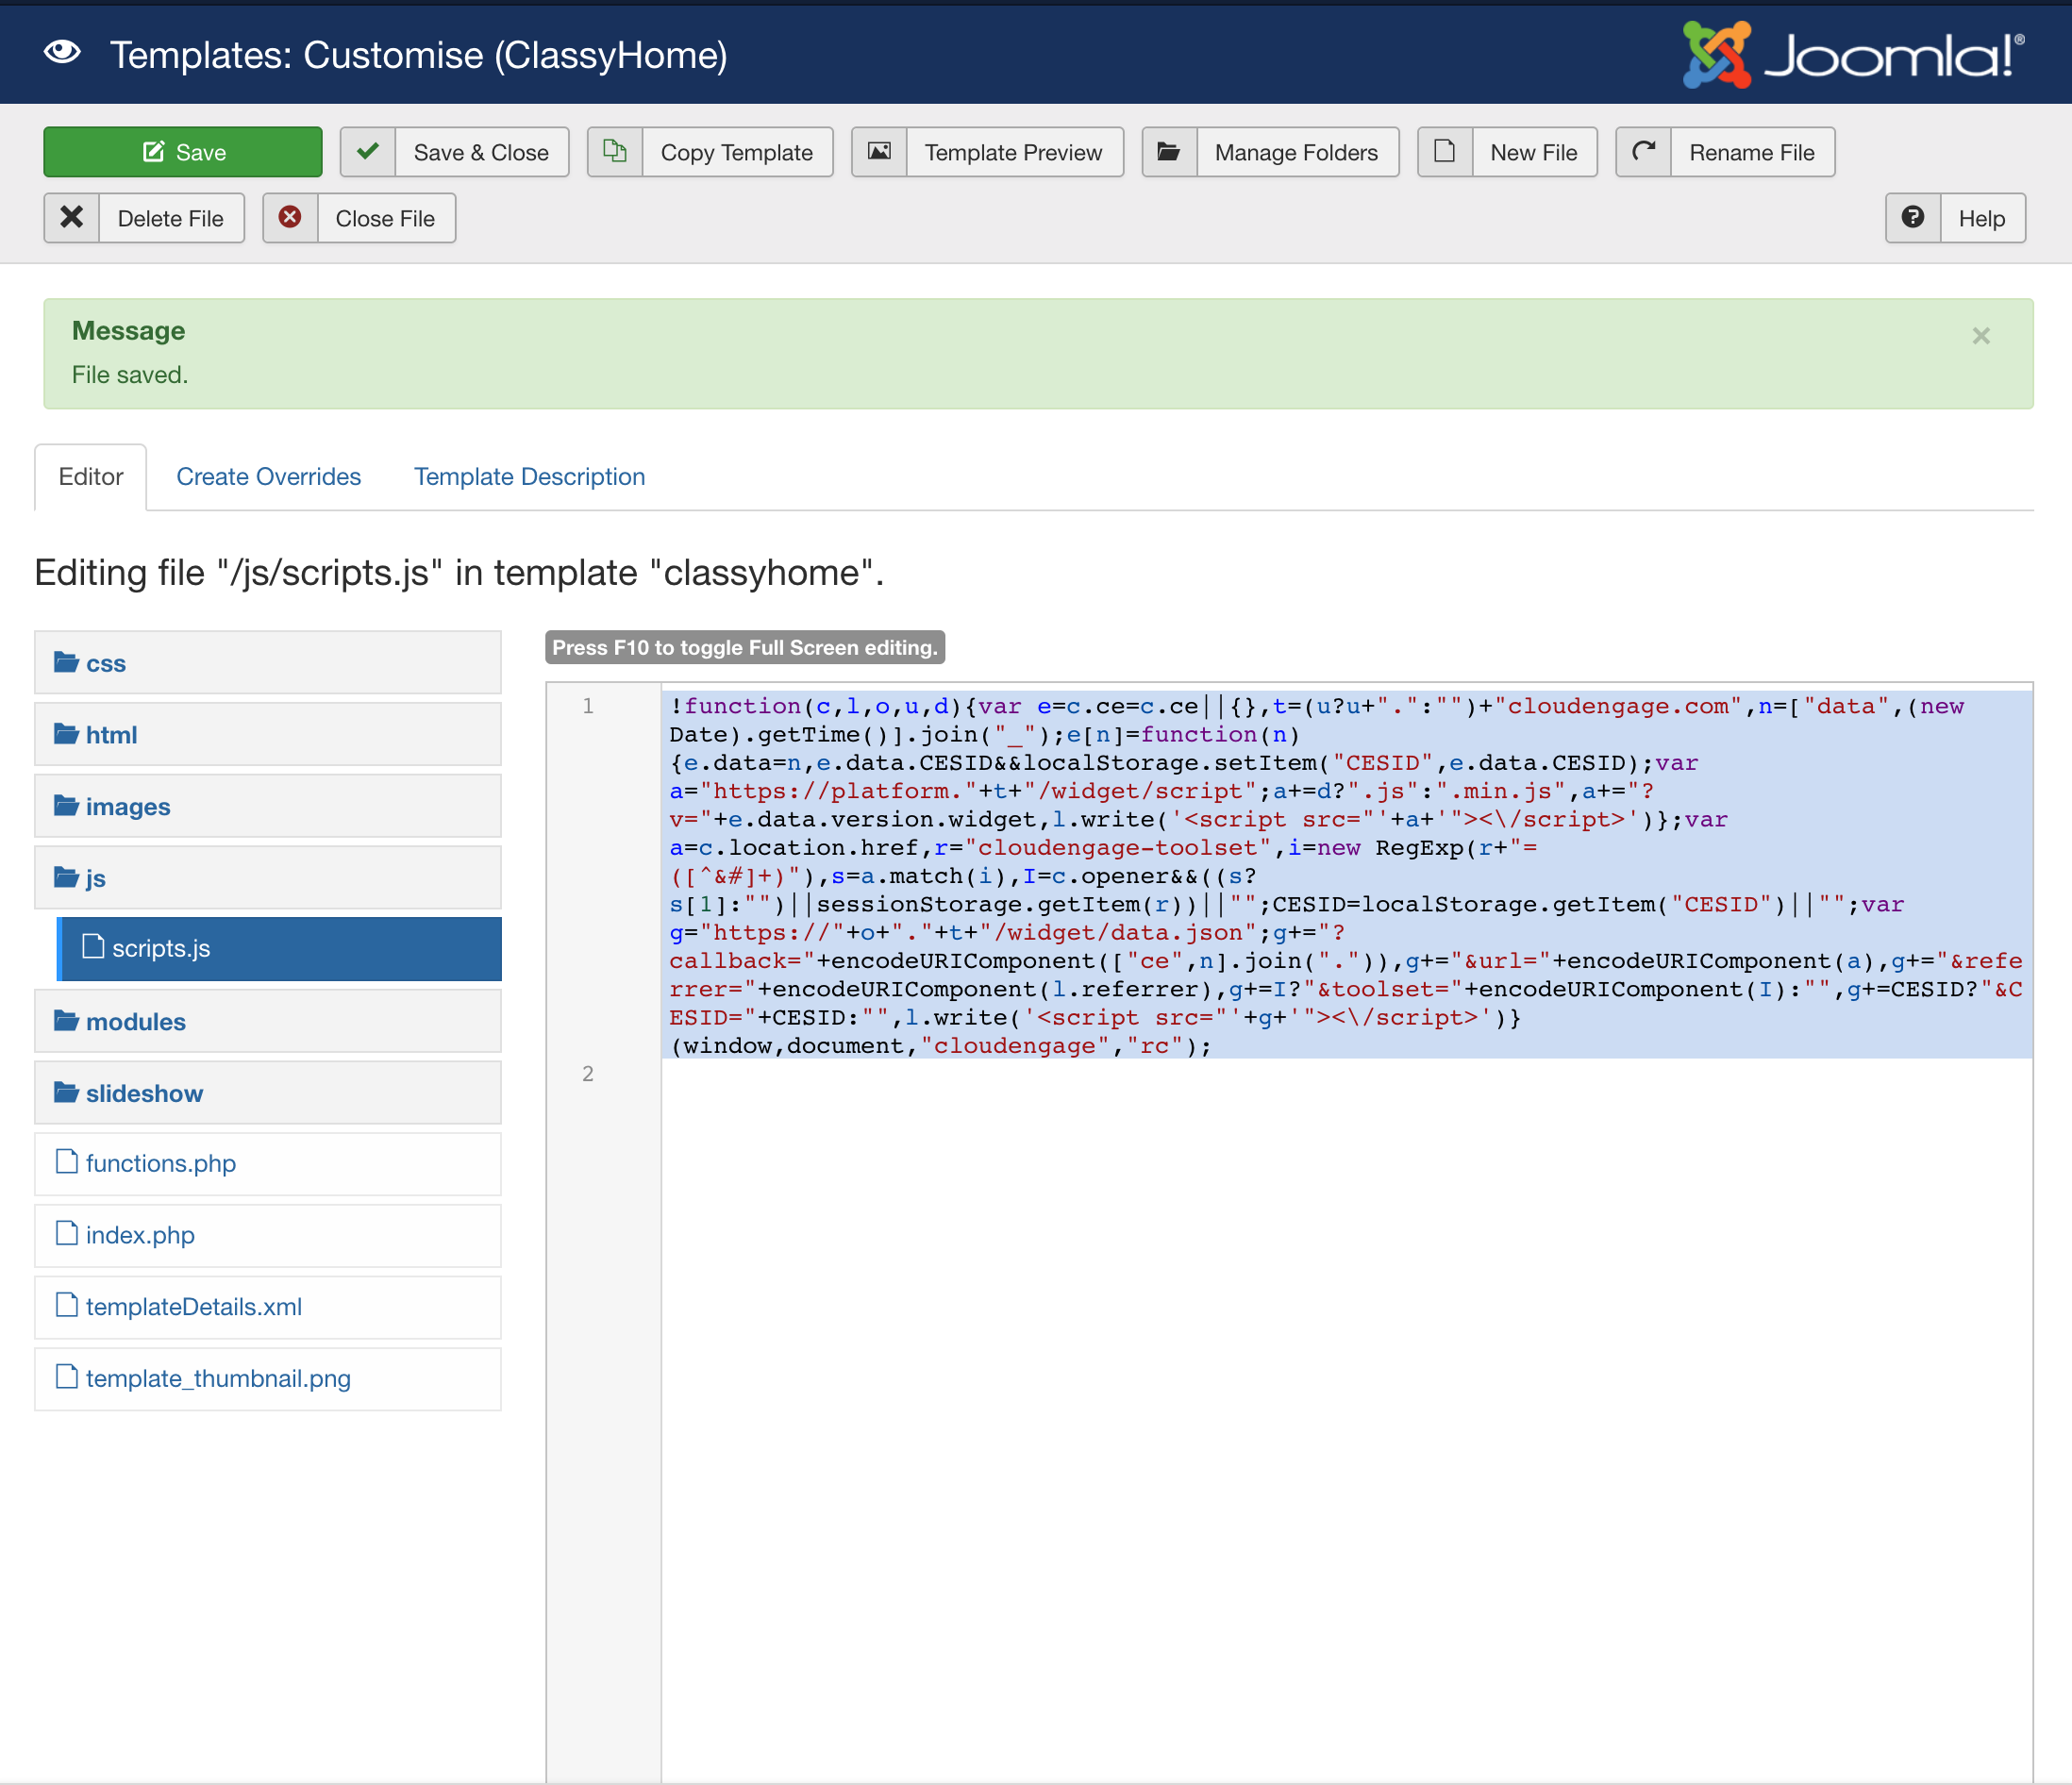
7. The final step is to create the actual file path that you determined in step 5 and within that destination, create your javascript file that was indicated at the end of that file path. Then simply log into the CloudEngage platform, navigate to Help > Installation in the left-side menu and copy the CloudEngage script from the resulting screen and paste it into the javascript file you created. **IMPORTANT** you must remove the containing <script></script> tag from around the copied javascript snippet in order for it to work in this case.
8. Now just click save and you are finished! The CloudEngage script is now installed on your website and you can verify its installation from within the CloudEngage Platform.
Related Articles
CBT News: Dealership geo-fence marketing
Location, location, location! It is usually the difference between a shopper looking for an off road capable 4×4 or a city dweller in need of an eco-friendly Nissan Leaf.
CloudEngage Acquires AnswerDash, Leader in AI powered Self-Service Support
We’re thrilled to announce that we’ve acquired Seattle-based AnswerDash, expanding our suite of offerings to Include AI powered self-service support SPOKANE, Wash., AND SEATTLE, Wash., June 23rd, 2020. Our entire team recognized the fit with AnswerDash was terrific....
Subscribe & Follow
Join Our Newsletter
Subscribe to our email list for news and offers. Follow us on social media.


