Create a Popup with a Form inside.
Forms can be used in Popups to collect customer information and expand your communications to ultimately generate more sales for your business.
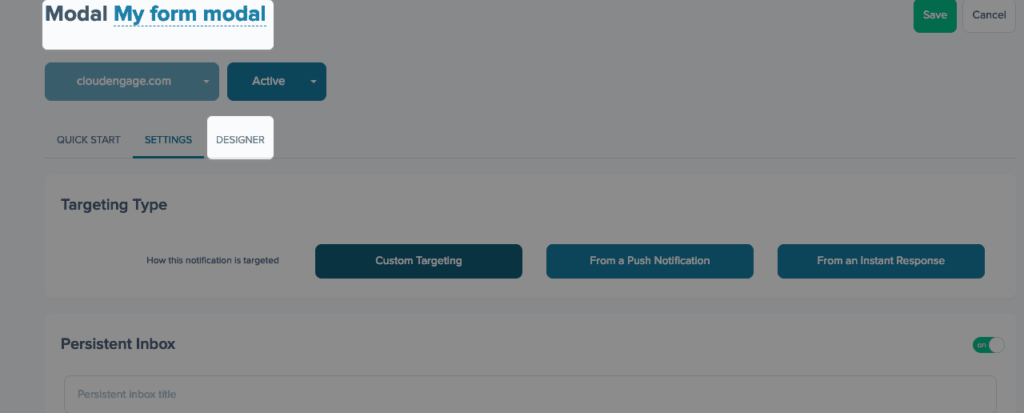
Go to the Popups menu item under Personalizations on the left, click the + button to begin creating a new popup. Enter a Description and select the Designer area.
![]()
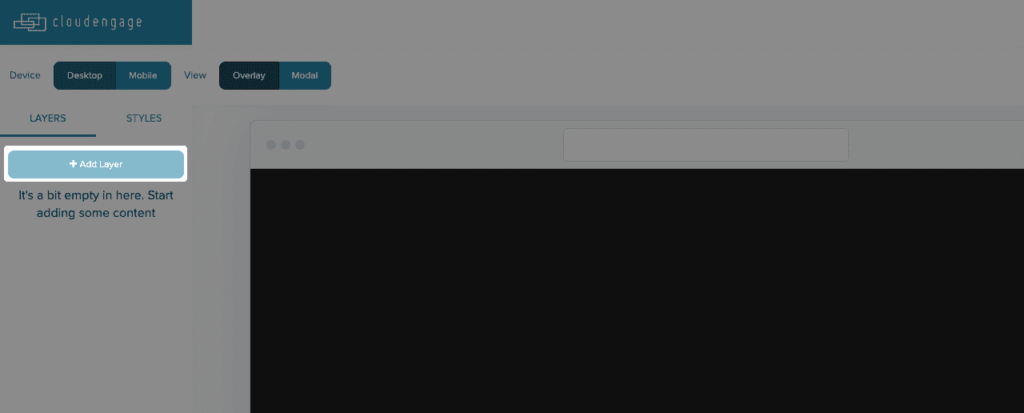
Once you’ve set up the basic design of your popup and are ready to add a form go to Layers, click the + button and select Insert Form.
Begin by dragging one of the input fields into the editor.
If it’s a Text Input field, give it a description and choose whether to check “is this field required?” box.
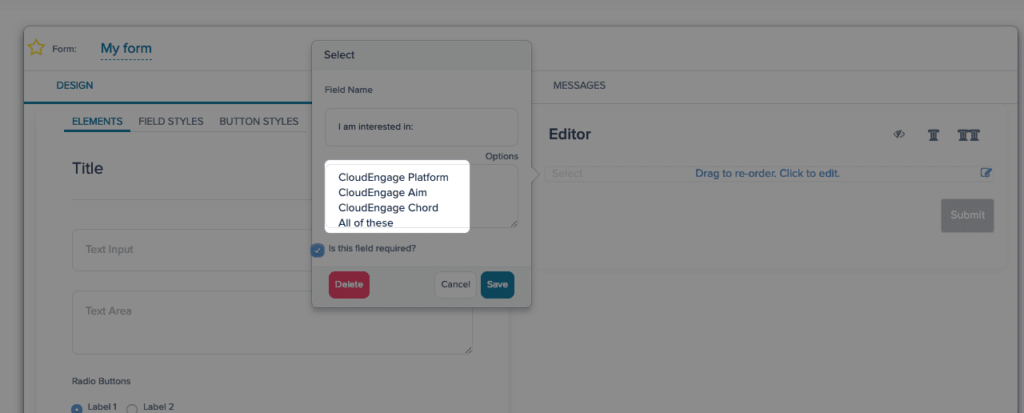
If it’s a Select dropdown field, give it a description, write in the options like those shown in the example and choose whether to require user input.
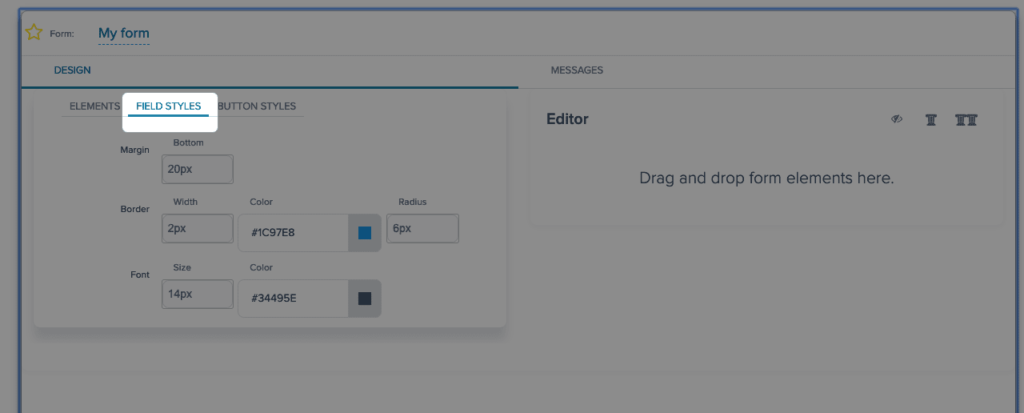
In the Field Styles area you can edit the sizes of the field, configure the radius (rounded edges of fields), and choose the desired color.
TIP: The “Color” field uses HEX Color Codes. Common practice is matching the colors of your form to that of your brand.
Set the Success and Failure messages for when form gets submitted.
Now you’ll want to set up a resulting action. You have three options here.
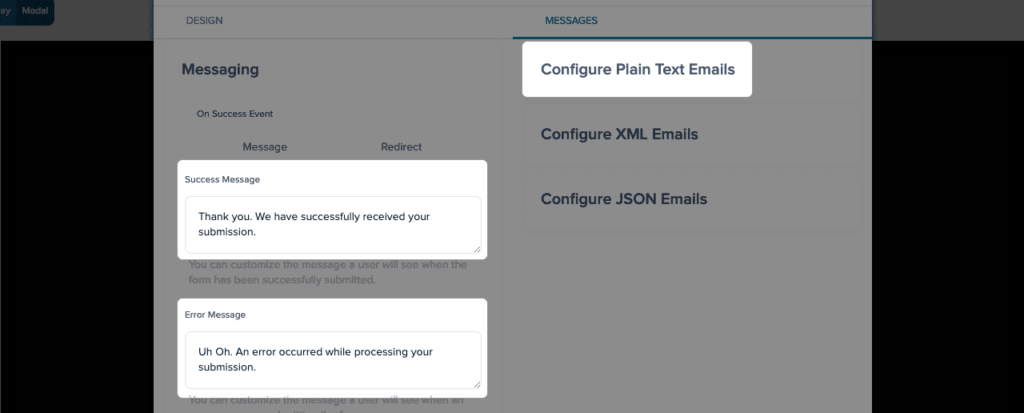
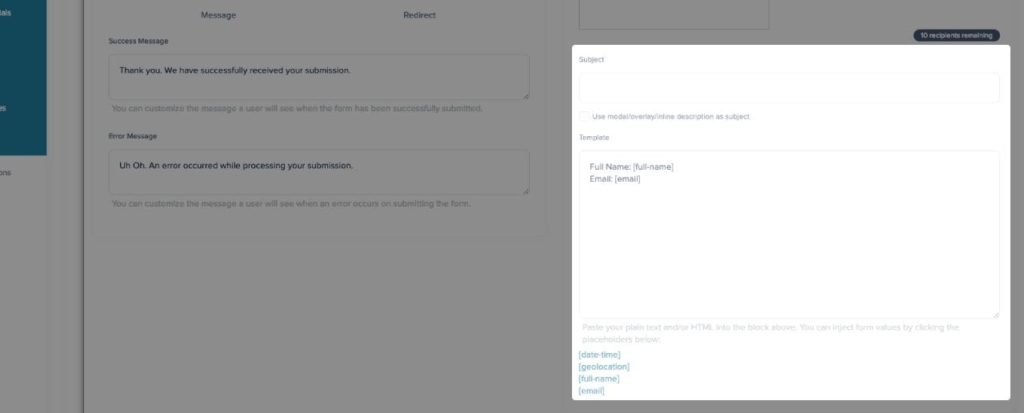
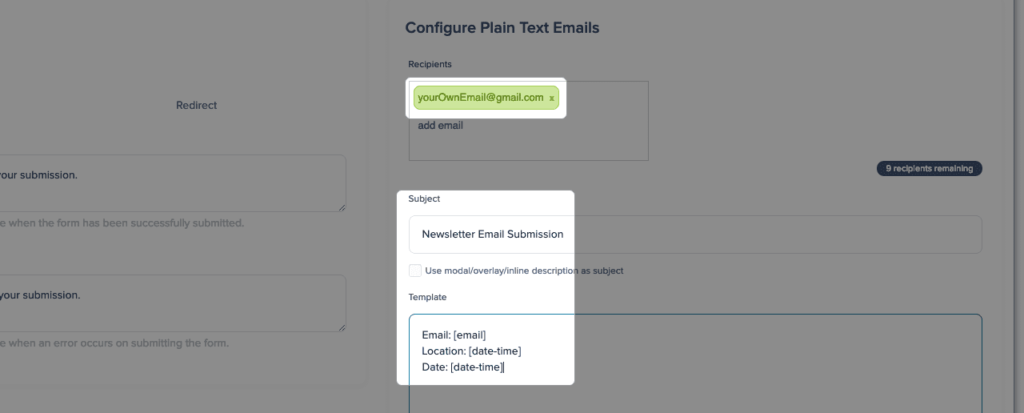
Configure Plain Text Email:
Pro tip: Many email services like Gmail allow you to filter your inbox by the email subject. You can then organize it all in a folder or you can even make it so that your primary inbox doesn’t get hit every time someone signs up for your newsletter. In addition to the email, CloudEngage allows you to take note of what state and municipality, date and time the submission came from.
The following values are at your disposal. Simply clicking them within the form builder will insert the proper text into the email template.
- date and time: [date-time]
- location of submission: [geolocation]
- email address: [email]
What this does is create a format for the automatic email you will receive every time the form is subscribed. For example, it could read:
date and time: 2017-06-13T23:48:17+00:00
location of submission: Portland, Oregon. United States
email address: [email protected]
Set the Subject to something descriptive and unique like “Newsletter Signups”.
Pro tip: You can use this unique subject line in your email box to create a distinct folder – in Gmail for example – so that you can easily retrieve these emails. More on this at the end of this tutorial.
Using JSON or c) XML messages . They are similar in that they also get email, but instead of plain text, the same information is now delivered in a code form.
TIP: You can use services like zapier.com to receive the emails and automatically send them to a Google Docs spreadsheet for example.
Sample XML Template:
<?xml version="1.0" encoding="UTF-8"?>
<contact>
<email>[email]</email>
<industry>[industry]</industry>
<datetime>[date-time]</datetime>
<geolocation>[geolocation]</geolocation>
</contact>
Notice that hyphenation was taken out of date-time (now datetime).
Sample JSON Template:
{ "contact": {"email": [email], "industry": [industry], "date-time": [date-time],
"geolocation": [geolocation]}}
Now you have a form of your own creation, used in collecting customer information. Review your changes and click the Save button.
Related Articles
CBT News: Dealership geo-fence marketing
Location, location, location! It is usually the difference between a shopper looking for an off road capable 4×4 or a city dweller in need of an eco-friendly Nissan Leaf.
CloudEngage Acquires AnswerDash, Leader in AI powered Self-Service Support
We’re thrilled to announce that we’ve acquired Seattle-based AnswerDash, expanding our suite of offerings to Include AI powered self-service support SPOKANE, Wash., AND SEATTLE, Wash., June 23rd, 2020. Our entire team recognized the fit with AnswerDash was terrific....
Subscribe & Follow
Join Our Newsletter
Subscribe to our email list for news and offers. Follow us on social media.