CloudEngage 10 – Persistent Inbox
This release has several key product enhancements,
All the features below will be visible when you next login to your Admin panel. Extensive contextual help is available within the UI, at the CloudEngage Knowledgebase or you are always welcome to contact support@cloudengage.com
Key Features
- Save any modal to an “inbox” so users can revisit it anytime.
- Send any modal to a printer
- Flicker-free option for replacement images
- New options for Push notifications with improved support for Chrome
- Track geo-image swap conversions on the dashboard
1. Persistent Inbox
You can now use allow any Modal or Alert to be “saved to persistent inbox”. This is ideal for special offers or other notices that you’d like your customers to be able to see again after the initial modal has fired and they’ve dismissed it.
Enabling Persistent Inbox will add a small graphic of an envelope onto your website, then, for any modals or alerts where you want it retrievable, your website visitors will be able to re-fire the modal just by clicking the title of the campaign from within the envelope.
You choose whether a Campaign is available inside the Persistent Inbox by turning it on and giving it a title on each campaign’s settings page.
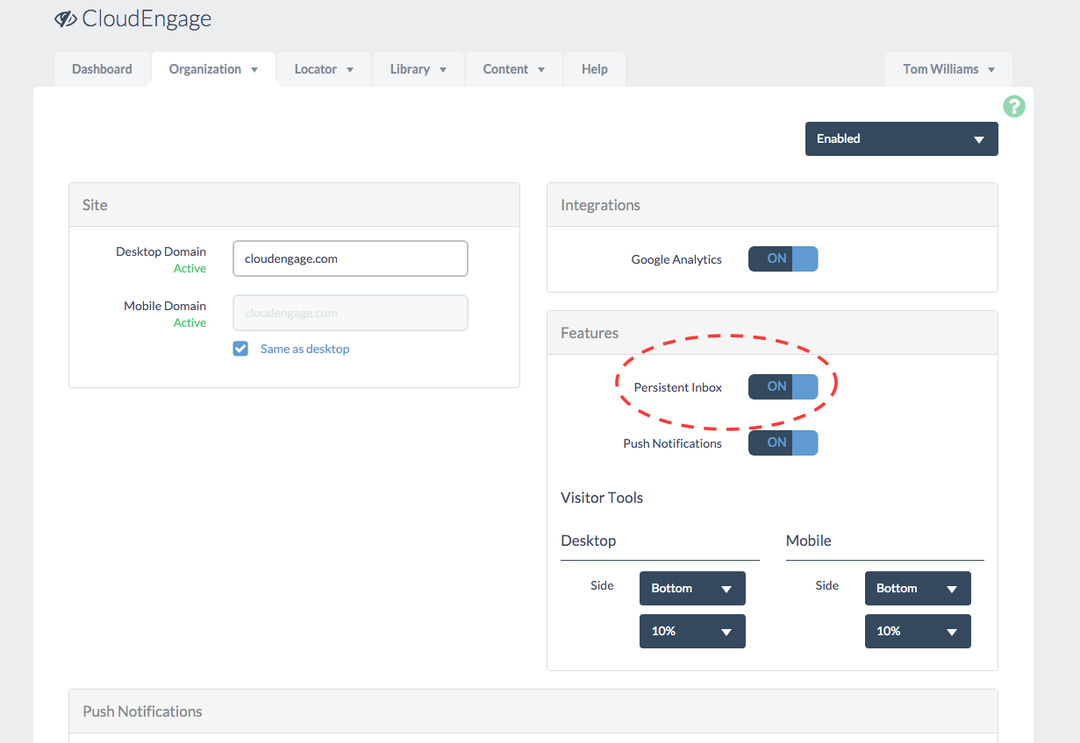
To turn on Persistent Inbox:
go to the Sites section on the Organization Tab in the CloudEngage Admin, then just click “Persistent Inbox — On” under Features. The “Visitor Tools” refers to the envelope where Persistent Inbox messages will live. You can select where on your site the inbox will appear. Typically people will choose the bottom or top of the page, indented some percent from the edge.
Once Persistent Inbox is enabled, you’ll see the option to send any Modal to the Inbox on each Modal’s settings page.
If you want to add a modal to the Inbox, you must give the Modal a “Persistent Inbox title” . This will be publicly visible. The Description box remains an Admin only internal description of the campaign
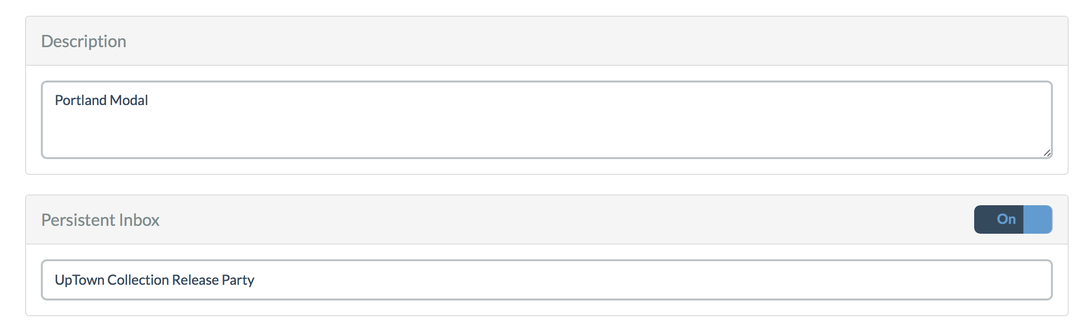
Every campaign in the inbox needs a public-facing title. Just add it in the Modal’s settings.
Once enabled, it will look like this on your site
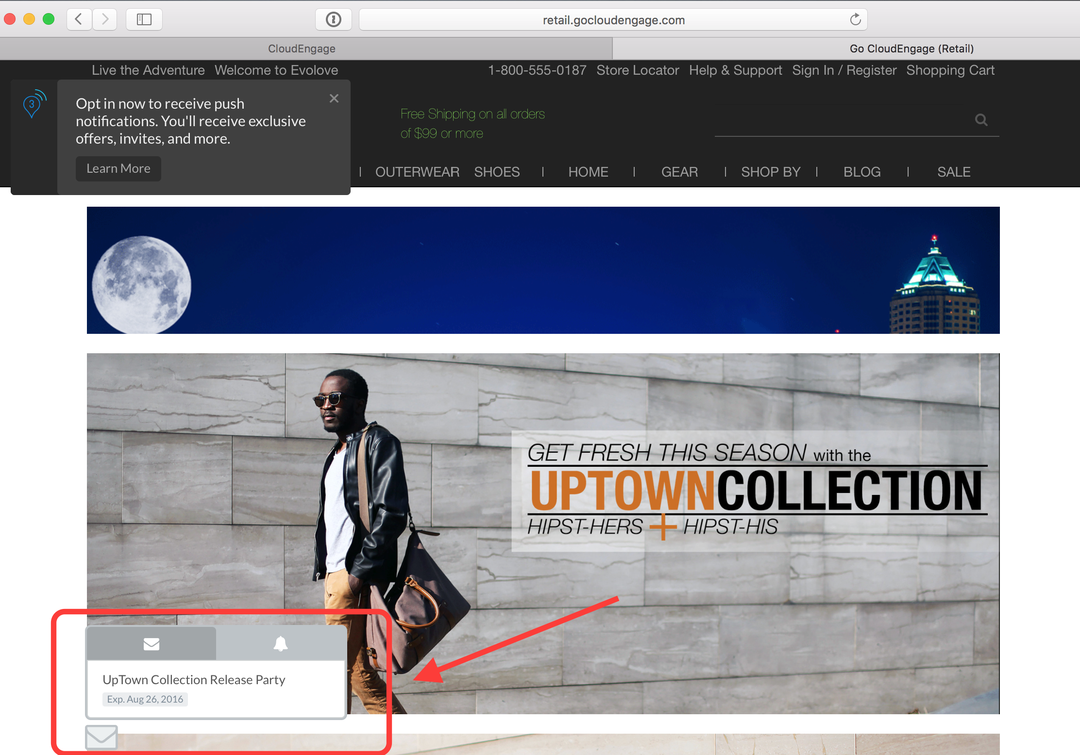
Note: Persistent Inbox is only visible if it’s been enabled in Site Settings.
Experiment with Persistent Inbox. It should add a lot of value to your modals and now people can refer back to them for as long as the modal is runnings.
For example, you may reduce the number of times the modal fires, since people will always have it available in their Persistent Inbox.
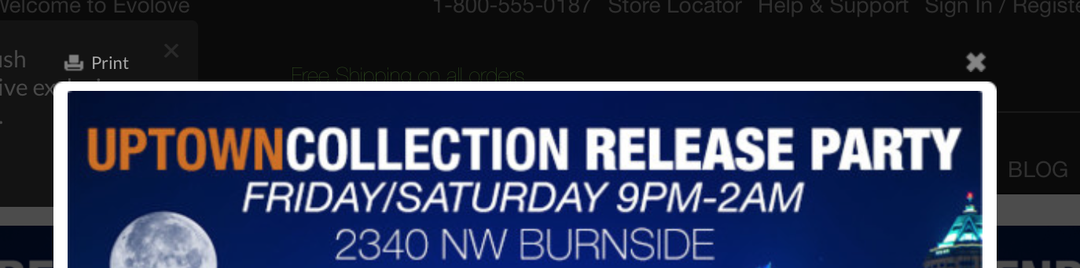
2. Send any modal to printer
You can now allow site users to send a modal to their local printer. This is ideal for redeeming special offers.
You choose whether a Campaign is available to be printed turning on “Enable Printing” on each campaign’s settings page.
A small print icon will now appear at the top of the modal.
3. Flicker-free option for replacement images
We have added a new option for managing replacement images. Prior to this release, the CloudEngage “widget” lived at the bottom of the HTML page, thus there was a “flicker” for replacement images where the original image would be seen for a few milliseconds before CloudEngage swapped out the image for the geo-targeted version. This flicker is common to all image replacement services, and is barely noticeable.
Engineering has created an optimized approach that allows the swapped image to be loaded directly, without the flicker. The result is a faster overall load time for the website. However, it does require that a second line of javascript be added to the header block of your page. This addition will only need to be done one time.
Technical Support is available to help with the install. Please contact them if you wish to use this approach.
4. New options for Push notifications with improved support for Chrome
We have added a new option for managing Push notifications in Chrome that will allow user preferences to be managed inside a nice modal on site rather than launching a new tab. This approach requires that your site have SSL, and there a couple of files that must be installed to meet Google’s security requirements on Chrome.
Technical Support is available to help with the install. Please contact them if you wish to use this approach.
5. New metrics on dashboard
You can now view click through rates on all image swaps via the dashboard.

Related Articles
CBT News: Dealership geo-fence marketing
Location, location, location! It is usually the difference between a shopper looking for an off road capable 4×4 or a city dweller in need of an eco-friendly Nissan Leaf.
CloudEngage Acquires AnswerDash, Leader in AI powered Self-Service Support
We’re thrilled to announce that we’ve acquired Seattle-based AnswerDash, expanding our suite of offerings to Include AI powered self-service support SPOKANE, Wash., AND SEATTLE, Wash., June 23rd, 2020. Our entire team recognized the fit with AnswerDash was terrific....
Subscribe & Follow
Join Our Newsletter
Subscribe to our email list for news and offers. Follow us on social media.
Subscription
"*" indicates required fields